Try This, Seriously!

In my opinion there are a TON of crazy myths in the waterfowling world. One of the worst myths that almost everyone falls into is the total fallacy that snow geese are "sky carp" and unsuitable for eating in any form other than jerky or sausage. My first taste of snow goose, cooked amazingly well, was on a trip to eastern SD about 15 years ago. A friend that we had met at a calling contest invited a couple of us out to join him on a late spring juvie snow goose hunt. He had been hunting for a few days and had a bunch of birds already. When we arrived at his rented trailer house (rented especially for snow goose hunting for the month of March) there were half a dozen snow goose breasts in the oven. When he opened it up to show us, I was nearly aghast when I saw that they were not in some form of soup, broth, marinade, bacon, etc. All of my experiences with eating or attempting to eat any form of waterfowl before that involved some manner of heavily seasoned sauce designed to entirely cover the flavor. So when I saw that we would essentially be eating plain snow goose with only a thin rub on it, I was ready to head to the gas station and pick up some chicken strips.
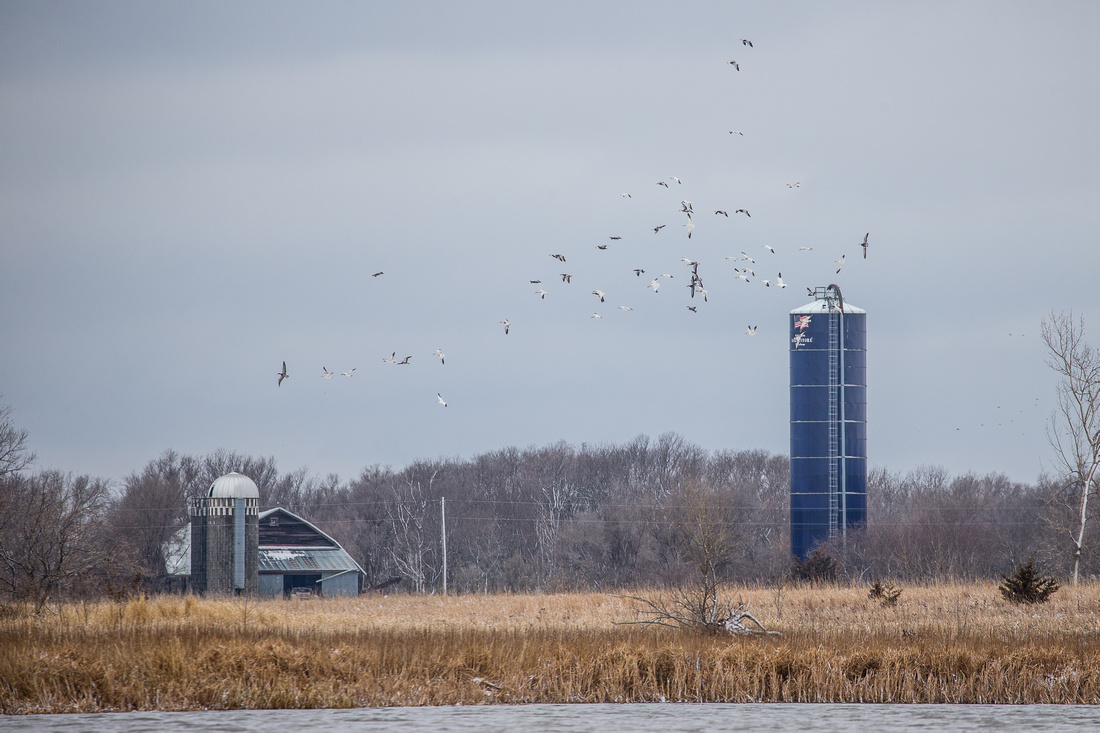

Above: Snow geese on a cold March day in South Dakota.
I was so pleasantly surprised by the taste of his prepared meal, mixed with a light plum sauce, that I always knew in the back of my mind that waterfowl could be delicious. Over the years, after trial and error and many less than desirable meals I finally cracked the code last fall. I am convinced that THE main problem most people have with waterfowl is that they are overcooking it. It takes a bit of a leap to really eat it when it's still red in the middle but it is really the only way, and it is really quite good. A huge breakthrough/revelation for me was last year when I bought a sous vide machine. If you hunt waterfowl of any sort, and struggle with ways to deal with the meat, I would urge you to pick one of these up. You almost can't overcook the meat and it will come out perfect every time. Read up on what they do, how they cook, and pick one up, I got one for $120 on Amazon. It was an Anova brand with the bluetooth connection to use your phone to control it...really slick.
We used that to cook mallards all last fall and both myself and my girlfriend went from dreading having to deal with duck meat to being excited for a day I got to out hunting so we could have duck again...a total 180 degrees from before! So here is the recipe that we used for some snow geese from earlier this week.
Ideally, pick some younger snow geese if you happen to have some.
Breast out the geese, being extra attentive to ensuring that you have all of the slimy skin off the top and all of the "silverskin" off as well. This process takes a few more minutes but is well worth it. I also spend an extra few seconds and cut out the little corner of the breast that has the big veins, tendons, and more silverskin...again, well worth the brief time spent.
Once you have the breasts out you'll want to get a big bowl to soak the meat in. My typical routine starts with me spending a bit of time cleaning the meat under the sink and washing out any blood from pellet holes and getting any other gunk off of them. Once that is all done I put them all in the bowl, with cold water, and a fair amount of salt in the water. I don't know the quantity of water but I pour a pretty good amount in, based on the size of the bowl. The salt helps to pull a lot of the blood out of the meat. Let the meat soak for anywhere from a few hours to overnight and repeat that process again. I will also at that time go ahead and squeeze each breast (don't get any funny ideas) to try and get any excess blood out that I can at that time. I will then let the meat soak for a day or two, depending on when I get around to taking care of it again. At this point you are ready to start the actual recipe.
You don't need much for ingredients but most guys probably won't just have them laying around the house so you'll need to make a quick run to the grocery store, while you're there I'd recommend a good beer to pair it with. So I've never written a recipe before and I don't really read many so I'm just going to plot it out below for you as I think about it:
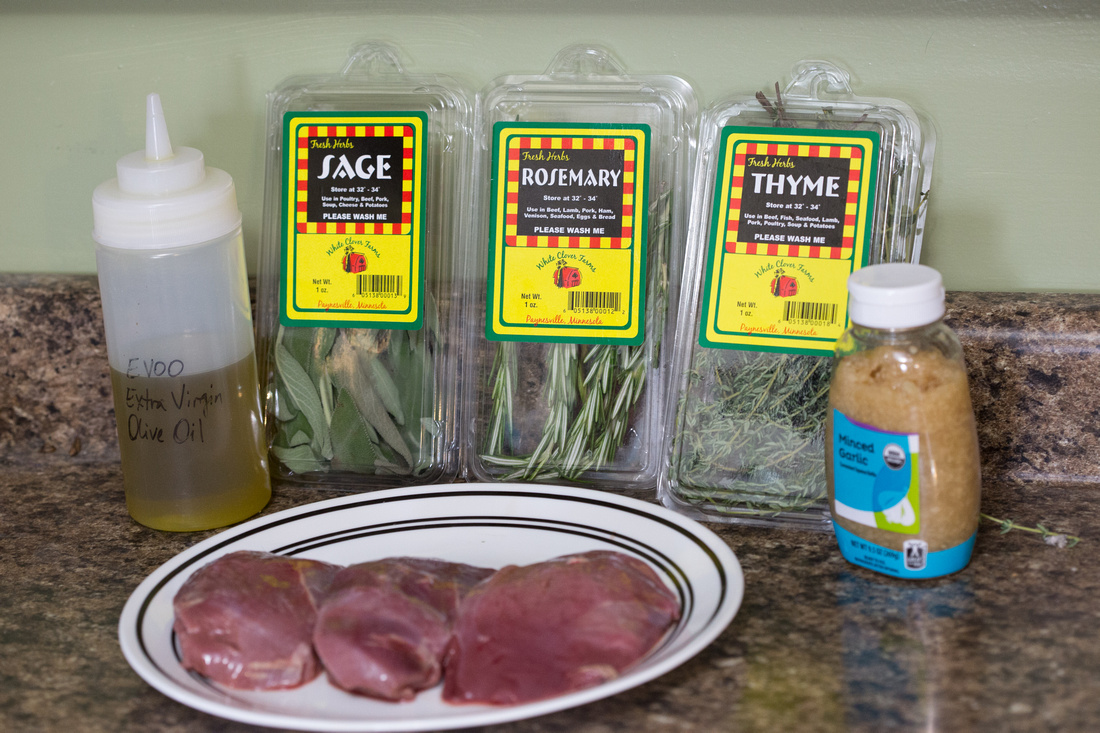
Above photo shows all the ingredients for one batch of sous vide snow goose!
-Take your goose breasts and put them in your food saver or ziploc bag (Ideally you'll use a vacuum sealer, if not, a heavy Ziploc freezer bag should work as well). I put three in one bag but that will vary depending on which size bags you are using.
-Now apply enough olive oil to coat the entire breast, maybe a tablespoon or two total for all three.
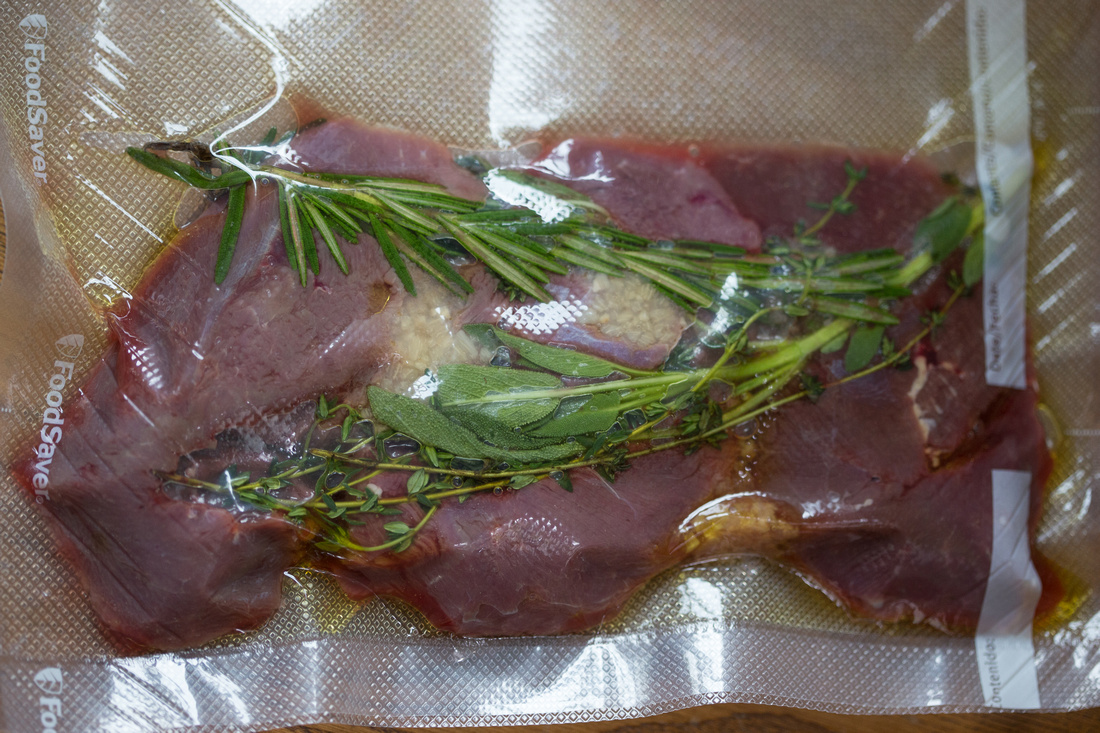
-Here's where you're going to need to go to the grocery store; you'll want to go to the produce section and get some FRESH thyme, rosemary, and sage. They look like weeds to me but I assure you they are well worth putting in the bag. So you take one or two each of these herbs (a full "branch" is what I guess you'd call it) and lay them over the breasts and on the olive oil. The olive oil will become infused with those flavors and soak into the meat.
-While at the grocery store also get a little squeeze bottle of garlic, or you can get the fresh stuff too...the squeeze bottle is nice because you can keep it around for whatever else you may need it for and it seemed to work for me pretty well.
-Now you're ready to seal up your bag. A vacuum sealer is again ideal, you'll want to seal it twice if you can with the vacuum sealer since the olive oil can sometimes get into the seal and make it not 100% tight. If you're using a freezer Ziploc bag you'll want to get as much air out as possible.
-You're now ready to sous vide these things...I did mine for 3 hours at 129 degrees and it was perfect. So, simply set your sous vide machine for 129 degrees and either set the timer on it or set one on your phone.
This is a link to the same one I've used on Amazon: Anova Sous Vide
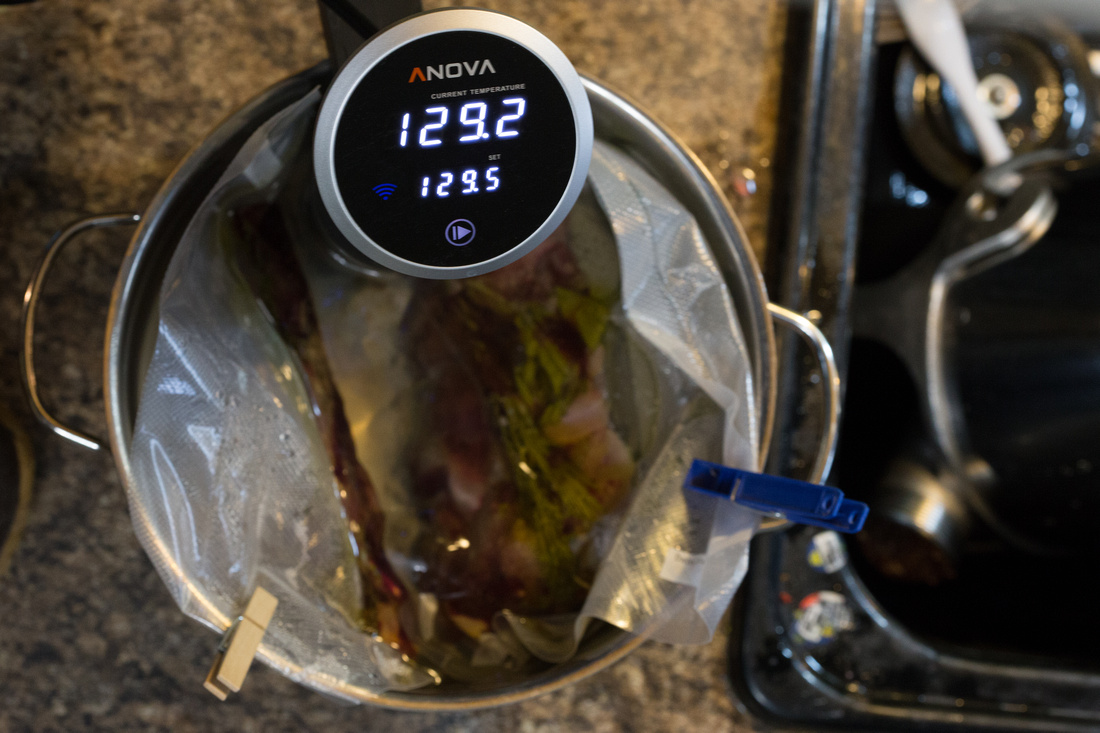
-Come back 3 hours later and take your meat out.
-The last step isn't absolutely necessary but it does help. We had our little grill heated up and threw them on the grill for one minute on each side just to get a little sear on the meat. It basically just adds a little better look and maybe a touch more texture to the outside of the meat. We also did let ours cool down considerably before putting it on the grill and that worked better than taking it immediately out of the water and putting it on the grill...I think you'd run the risk of overcooking it if you did that.
-Slice thin and enjoy. It really is amazing!
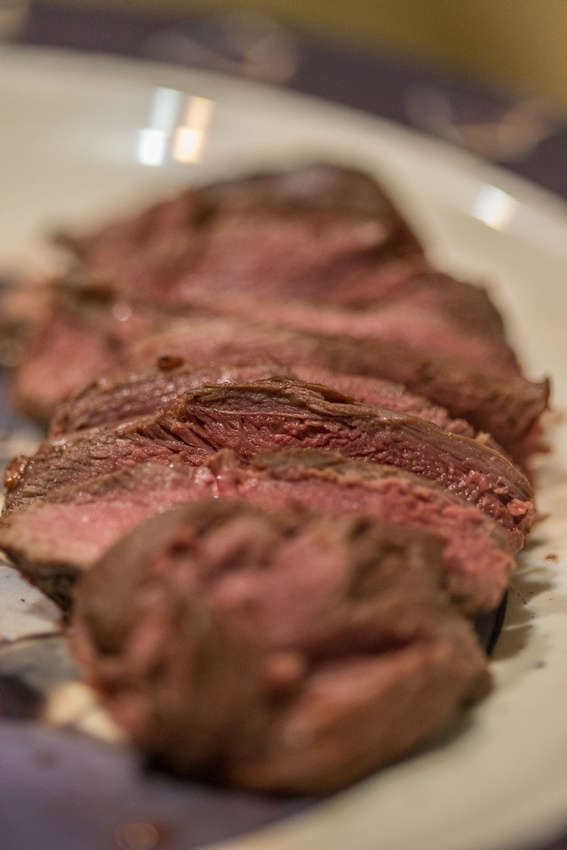
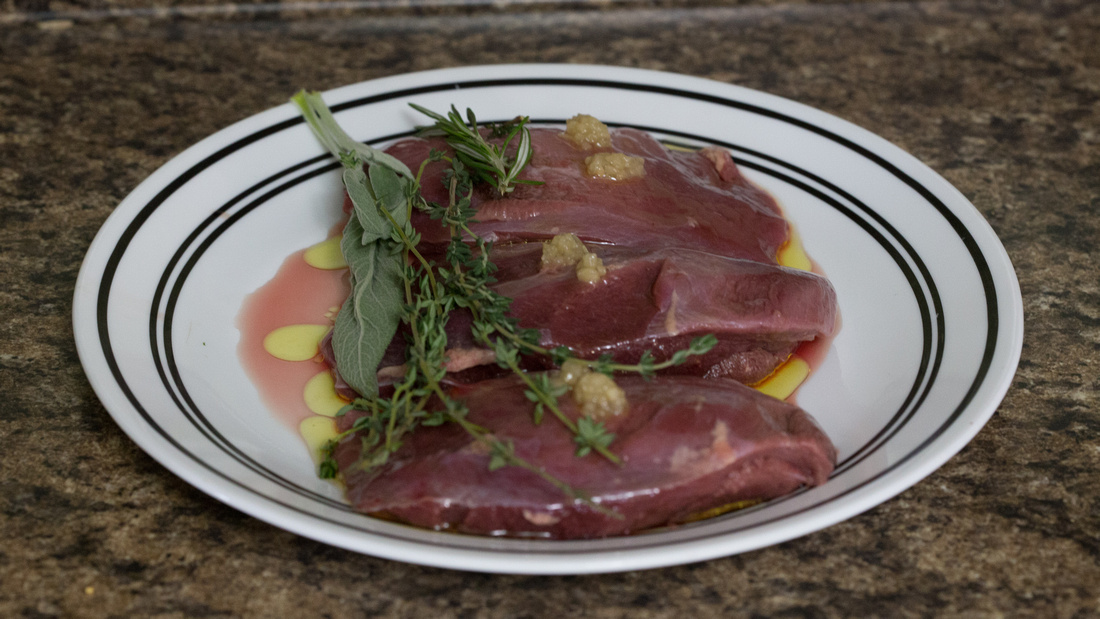
Above photo is what it should look like before you put in in the vacuum sealed bag to cook it. Below photo is what it will look like once it is sealed up and ready to go for cooking.